From Blank Canvas to Finished Painting
There’s something beautiful about starting a new painting. Every piece begins pretty much the same way: with a blank canvas, a spark of an idea, and the simple question, “What wants to live here?” Today I wanted to share a little behind-the-scenes look at how each original painting moves from a vague idea to a finished piece ready to find its new home.
1. The Spark
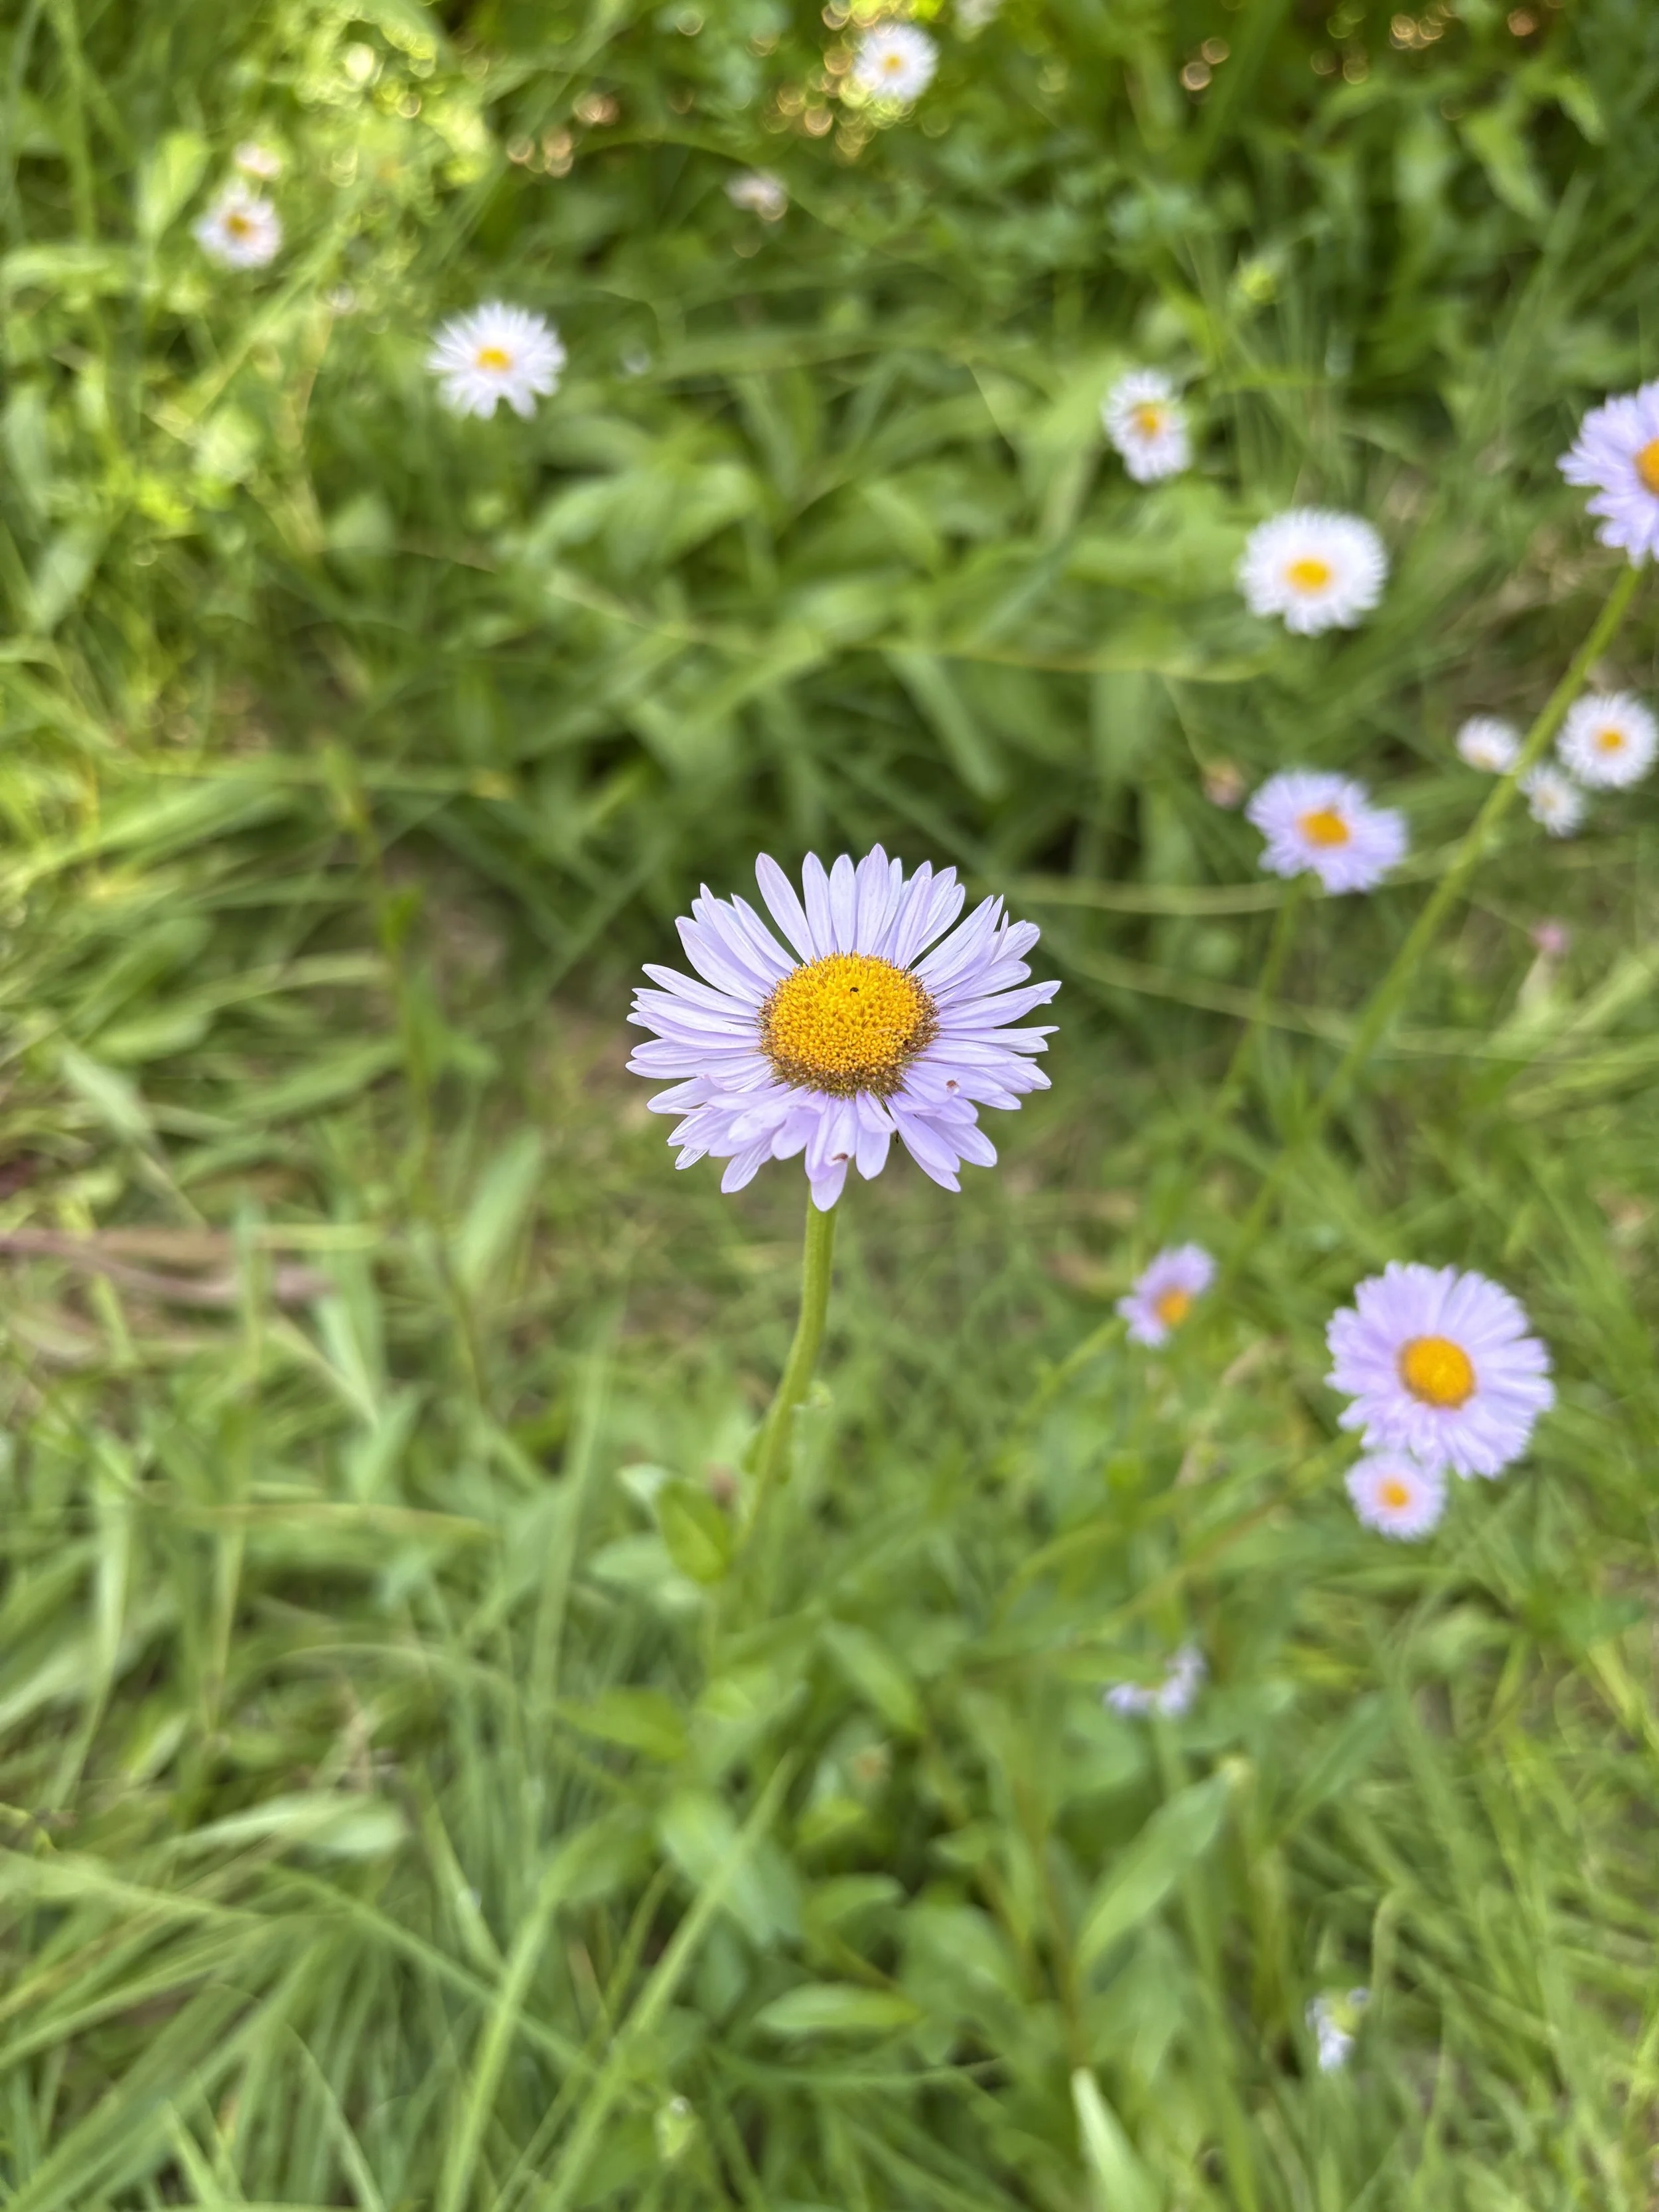
Before any paint touches the canvas, there’s usually a lot of thinking and noticing that happens first. I collect inspiration constantly, gathering pictures of color combinations from nature, feeling the textures of the surfaces around me, looking at how the light shifts throughout the day, feeling into the tiny moments that seem worth holding onto.
Sometimes a painting begins with a color. A soft moss green that feels grounding. A deep indigo that feels expansive. Other times it starts with a feeling, such as the calm after a long week, warmth from a slow morning, or the quiet steadiness of a nature walk.
From there, I start making a plan. I’ll sketch out some of my ideas, refine the main shapes and composition, and pick the base colors I’ll use.
2. Preparing the Surface
Most of my originals are painted with acrylic on stretched canvas. I’ll prep the surface with gesso if needed, though most of the canvases I get come already prepped which allows me to get into the painting process quicker once inspiration strikes.
Then comes sketching or underpainting. A lot of times I’ll sketch right onto the canvas with a light shade of colored pencil, which works great since the marks won’t “melt” into the paint like graphite pencil marks often do. Other times, I’ll do a sort of sketch using watered-down paint, blocking in large areas of darker values with a neutral color such as burnt sienna. I honestly don’t have much rhyme or reason for using a sketch vs. an underpainting for any particular piece, it’s just a matter of what technique I feel like using in the moment.
Doing either the sketch or underpainting helps me get past the fear of messing up a pristine blank canvas. Plus, blocking in the large shapes first and adding detail later on in the process allows me to focus on composition so the whole thing feels more balanced right from the start.
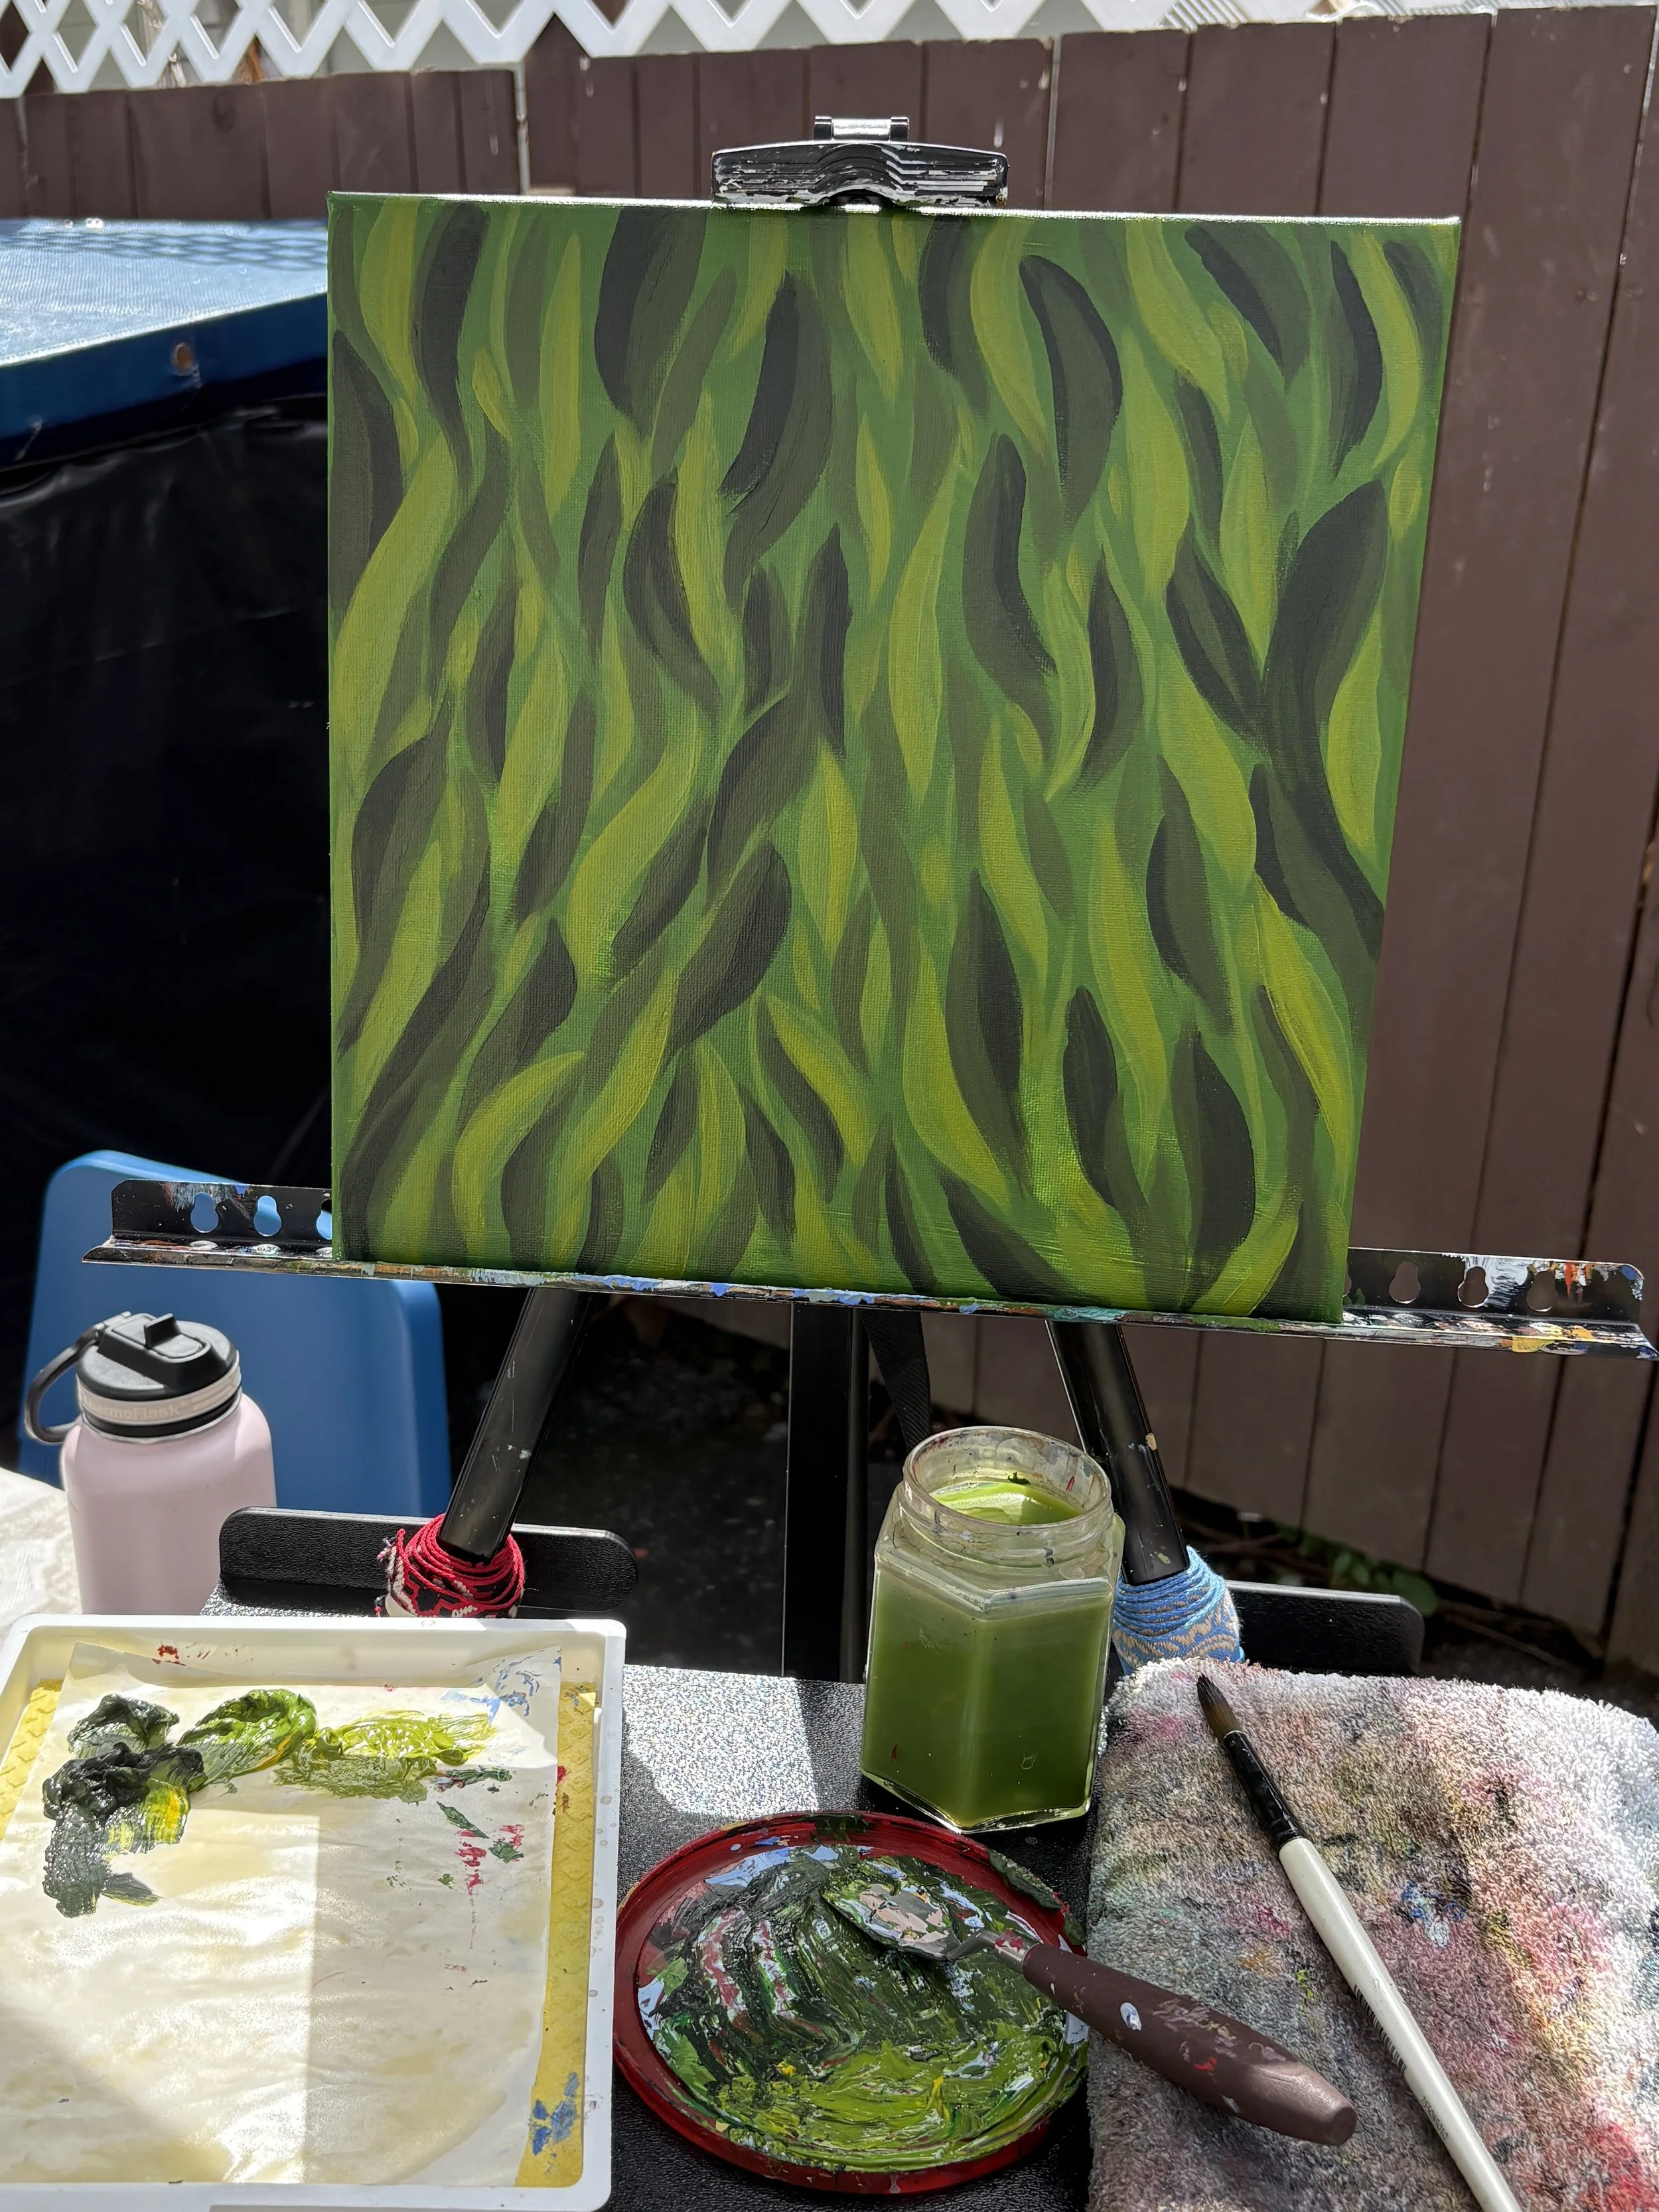
3. Building Layers
Acrylic paint dries quickly, which allows me to build up layers without long waiting periods. Once the base colors are blocked in, I begin refining. This is where the painting really starts to reveal its personality.
I add depth through layering: thin washes in some areas, thicker texture in others. Mainly I use round brushes, but sometimes I’ll use flat brushes or palette knives to create different looks and variations. Throughout the painting process, I step back often. I tilt the painting. I turn it upside down. I look at it from across the room.
There’s a silent conversation that happens here between me and the canvas. If a section feels too heavy, I lighten it. If something feels flat, I add contrast or texture. If a color isn’t working, I paint over it and try again. I try my best to listen to what the painting is “wanting” me to do, letting my intuition guide me.
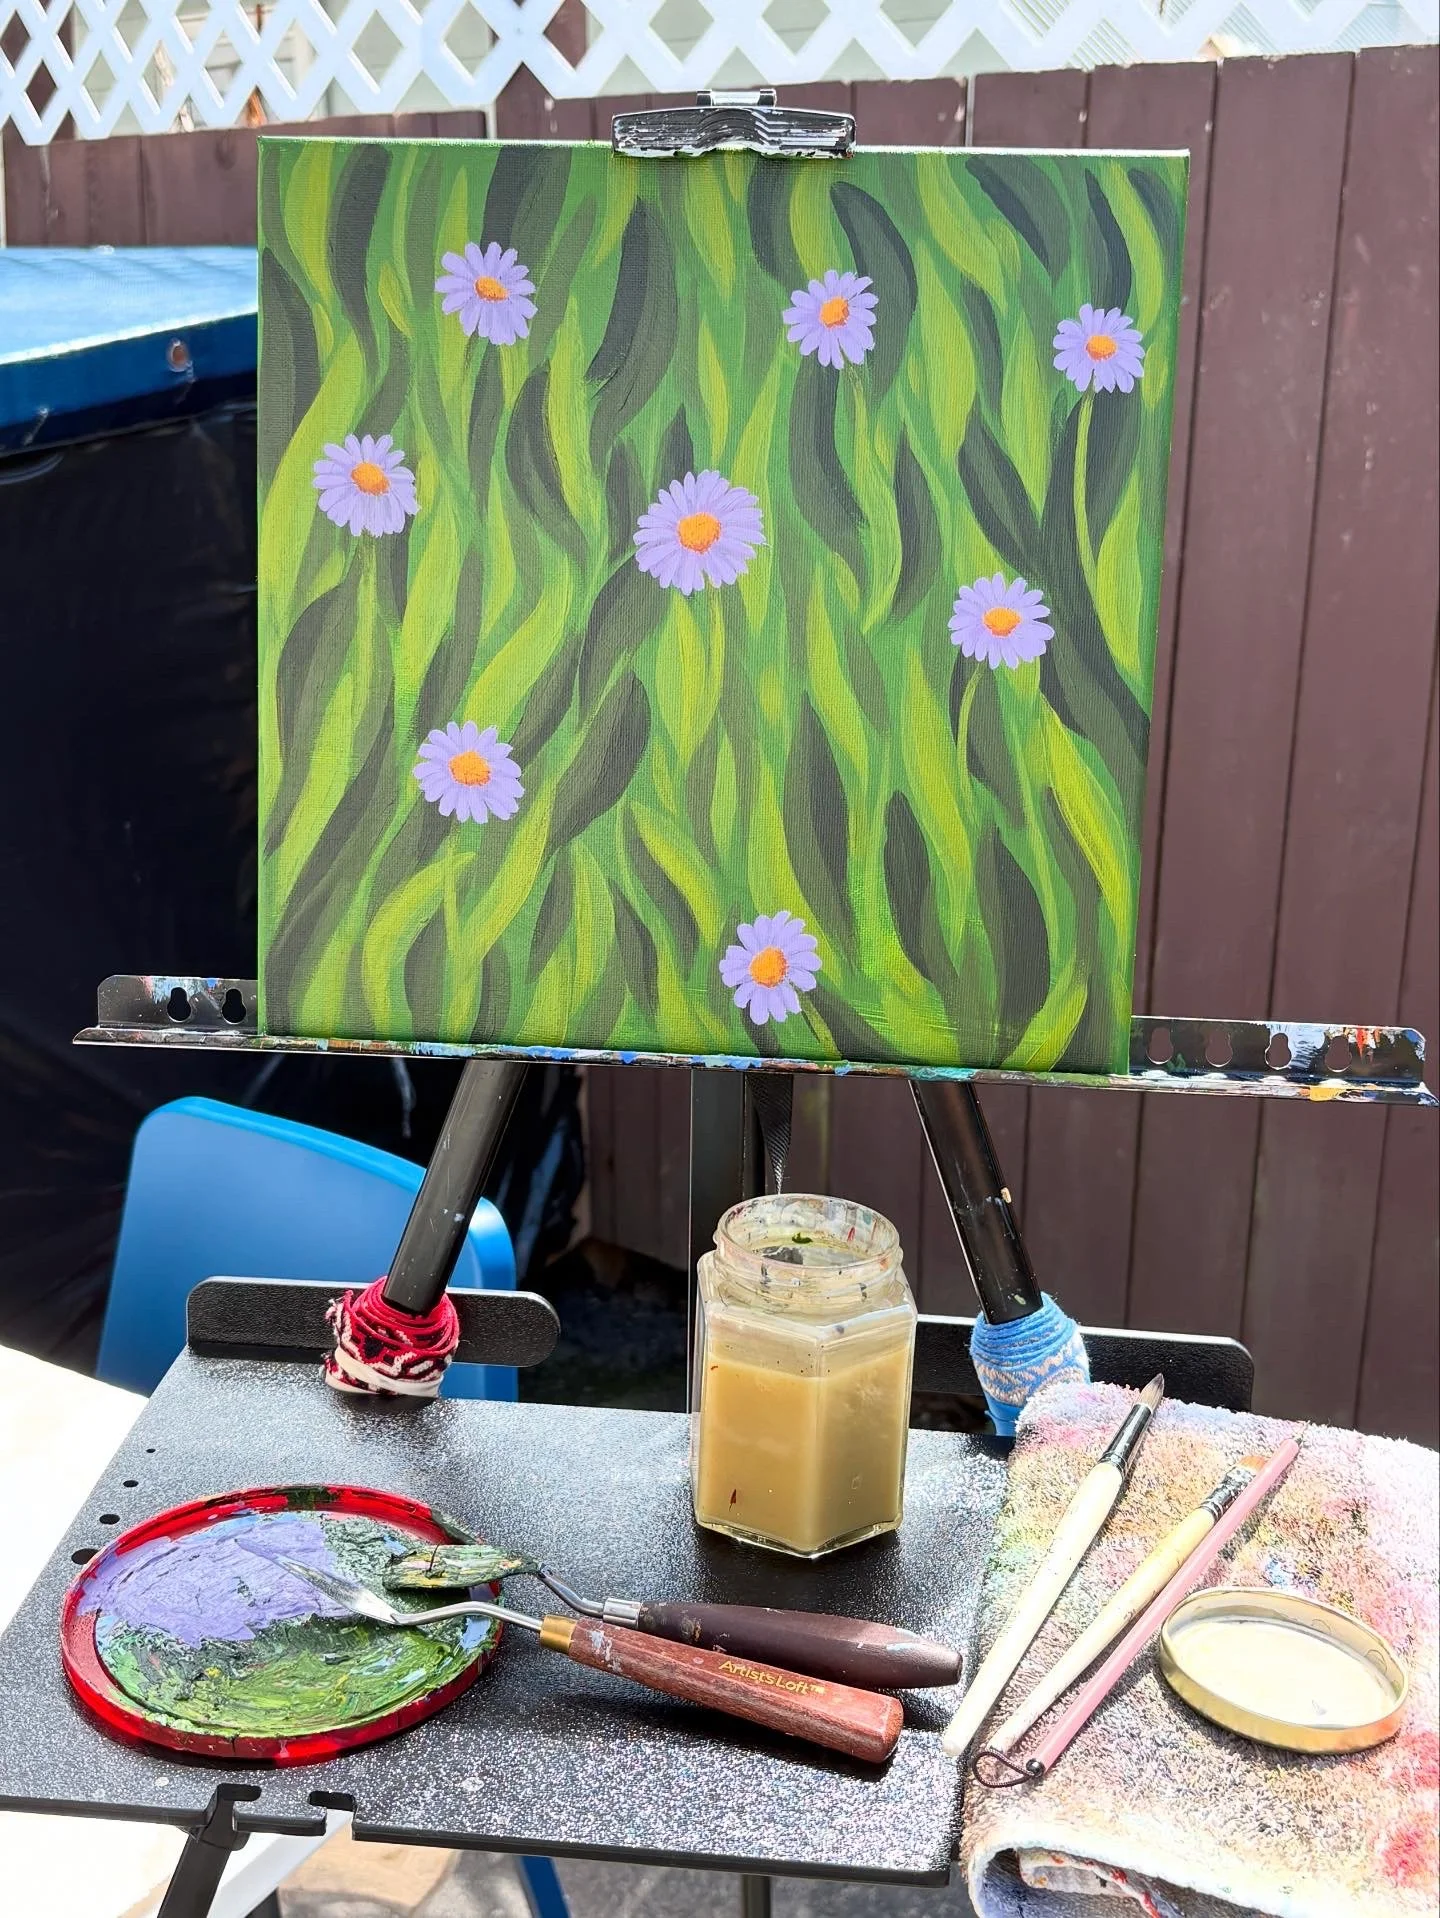
4. Details
Once the painting feels balanced, I move into adding some more intentional details. This might be subtle linework, softened edges, or gentle highlights that bring a bit of light into the piece. I mainly use paint for the details, but occassionally I’ll also use another medium such as colored pencil or oil pastel, whatever feels right for the piece. I particularly like using colored pencils for adding detail to animal fur and whiskers, since you can easily get much finer detail than with paint.
At this stage, I’m thinking about how the painting feels emotionally. Does it flow together? Does it feel grounded? Is there a natural resting place for the eye?
Sometimes I’ll live with a painting for a few days or even weeks before calling it finished. I’ll prop it up in my apartment and glance at it throughout the day. If I don’t feel the urge to change anything after sitting with it, that’s usually my sign it’s done.
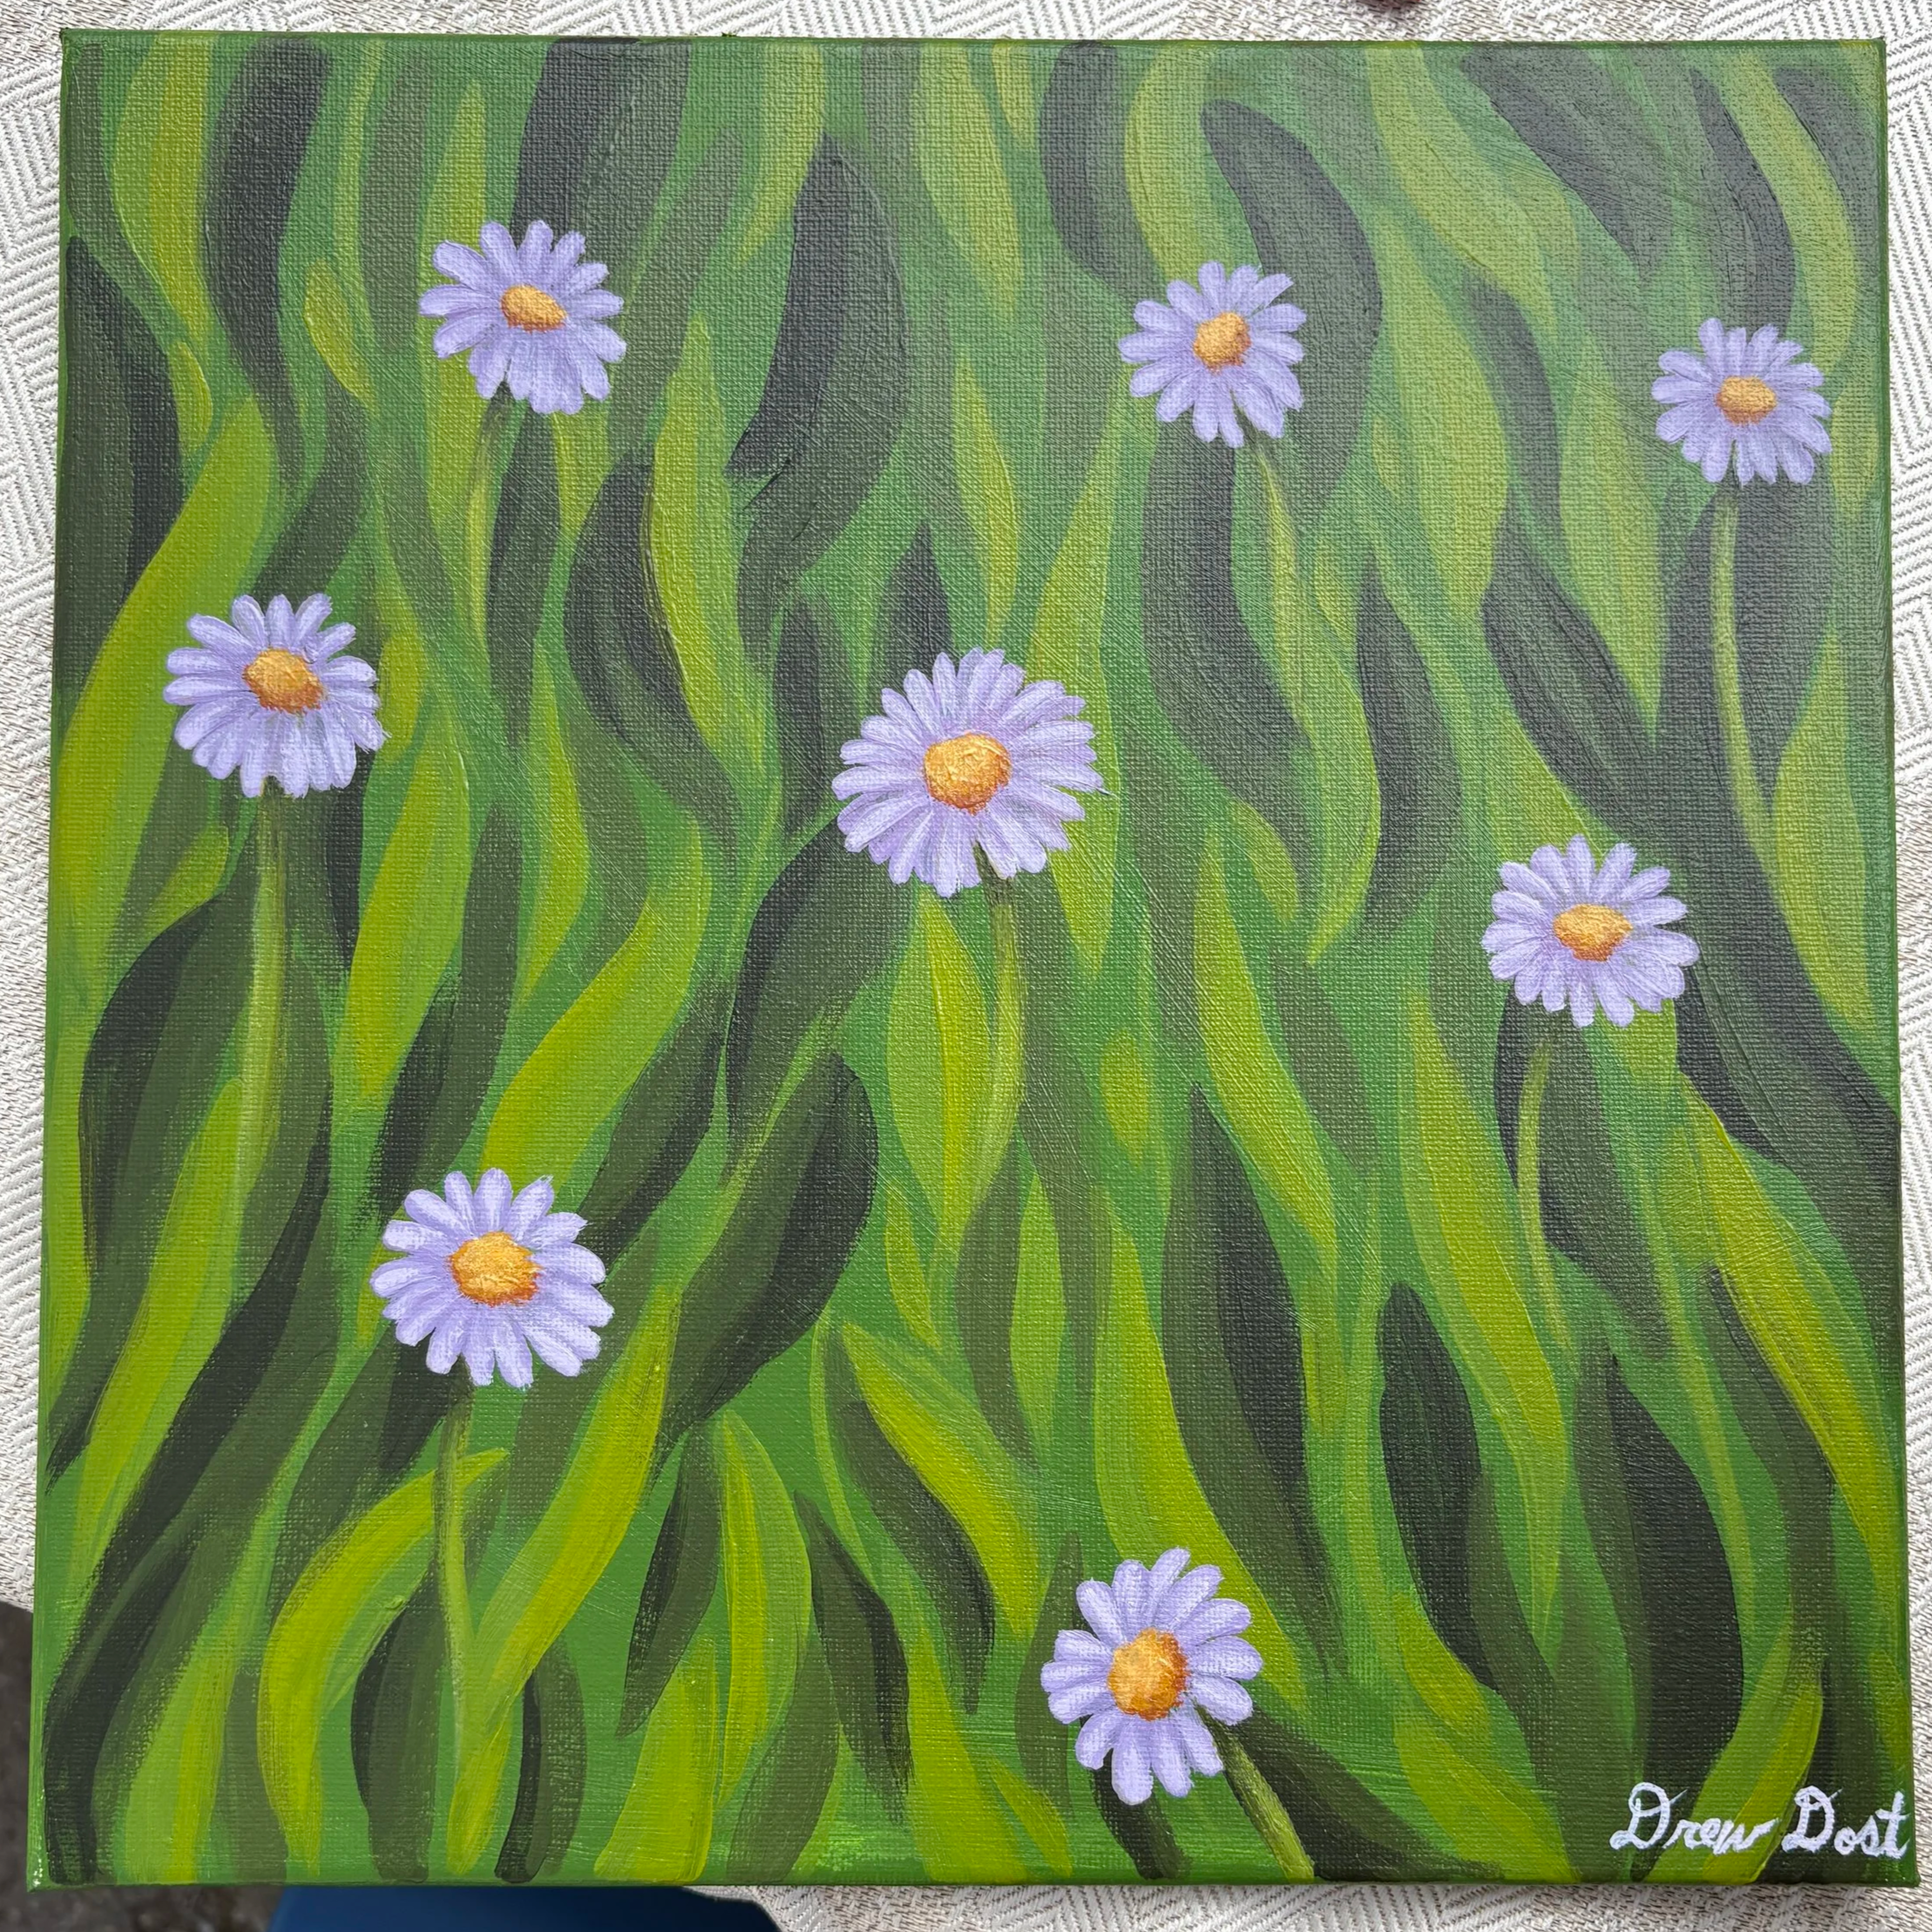
5. Finishing Touches
Once finished, I sign it, usually in the front right corner. Signing a piece always feels meaningful. It’s the moment of acknowledging that this thing that once didn’t exist now does.
Then, I often seal the painting with a protective varnish. This enhances the depth of the colors and protects the surface from dust, UV exposure, and getting banged up from handling and hanging it.
If I hadn’t done it at some point earlier in the process, I then attach a hanging wire in the back with D rings so it can be easily displayed either on someone’s wall or in a gallery show. These are easy to remove if customers want it framed in the future, but I like giving the option to hang it up on its own right away.
After all of that, I photograph it in natural light to capture the colors as accurately as possible. This step matters so much because I want you to see the painting as it truly is, with all its textures, colors, and nuance.
6. Letting It Go
Releasing an original painting into the world is both exciting and tender. Each piece carries many hours of work, problem-solving, emotion, and consideration. But art isn’t meant to stay hidden in my home.
The best part of creating originals is knowing they’ll eventually become part of someone else’s space, whether that’s hung in a living room, above a desk, or in a cozy bedroom corner. My hope is always that each painting brings a small sense of calm, warmth, or inspiration into someone’s everyday life.
If you’ve ever wondered what goes into an original, I hope this gives you a little glimpse into that process. And if you’d like to see what’s currently available, you can browse my latest original acrylic paintings in the shop. You can also email me at cohnanddost@gmail.com if you’re interested in getting a custom painting commissioned.
I also share behind-the-scenes studio moments, works in progress, and early previews of new pieces over on Instagram. And if you want first access to new originals, I’d love to invite you to join our newsletter. Subscribers get early shop updates, exclusive previews, and occasional creative notes from us.
Thank you for being here and for caring about our handmade art. Whether you’re a long-time collector or brand new to my work, I’m so grateful you’re part of this creative journey.
- Drew Dost